CMM (Coordinate Measuring Machine)
Arm CMM
Discover KEYENCE's Arm CMM Solutions. Achieve precise measurements with portable and robotic arm-based CMM technology. Streamline your measurement process and accurately measure arm length.
What is an Arm Type Three-Dimensional Measuring Machine?
An arm-type three-dimensional measuring machine, also known as an arm cmm or coordinate measuring machine (CMM) is a type of CMM that measures using an arm with multiple joints.
Compared to a gantry type CMM, the accuracy of a measuring arm is generally inferior, but the degree of freedom in installation is relatively high, and this arm cmm device is often used for three-dimensional measurements at manufacturing sites.
Measuring Principle of Arm Type Three-Dimensional Measuring Machine
Each arm cmm joint is equipped with a rotary encoder from which the angular information of the measuring arm joint movement is obtained. The distance between each joint is defined by the arm length between the encoders. By combining this angle information with the distance (arm length) information between each joint, the coordinates of the measuring unit at the tip are calculated. The number of rotation axes of joints varies depending on the model, but 6 axes and 7 axes are generally used.

-
16. Axes
-
25. Axes
-
34. Axes
-
43. Axes
-
52. Axes
-
61. Axes
Arm-Type Three-Dimensional Measuring Machine Configuration
The arm cmm measurement unit consists of a base, arm, joint, and probe with a measuring trigger and a stylus. The arm cmm machine stylus can be replaced with different types depending on the purpose. In addition, the software-based arm cmm measurements are generated on a dedicated PC, and it is used by connecting to the measuring unit.

-
1Joint
-
2Arm part
-
3Stylus
-
4Measurement
-
5Foundation
-
6Control PC
Features and Disadvantages of the Arm-Type Three-Dimensional Measuring Machine

The advantage of the arm-type CMM is the flexibility of the measurement location. Because the measuring arm is relatively light (compared to traditional CMMs) and portable, arm cmms can be installed wherever you need it in order to take your measurements. Generally, it is used by fixing the base part with a magnet, etc., as shown in the figure below.
An arm cmm machine is also used to measure objects that are relatively large compared to the gantry type CMMs.
Compared with a large-scale gantry-type CMM, an arm-type CMM can achieve measurement without taking up a large space.
Disadvantages of the Arm-Type Three-Dimensional Measuring Machine
Concerns About Measurement Accuracy Due to Mechanical Structure

The accuracy of the arm-type CMM is guaranteed on the assumption that the physical distance between the encoders is a constant. Therefore, there is a concern that the accuracy will deteriorate if the arm or joint, which is a component, is deflected or twisted, or if the joint is worn due to repeated use. Therefore, it is common to perform maintenance and recalibration regularly on an arm cmm machine.
Limit of the Measuring Range

Of course, the reach of the arm is determined by the length of the measuring arm.
The measuring range of a typical arm-type CMM is about 3m to 4m, and does not get much larger than that. The longer the measuring arm, the greater the effect of deflection, resulting in a great loss of accuracy.
Measurement Routing and Ease of Handling

The base of the arm-type CMM and the measurement target point must always be physically connected. When measuring a deep part or measuring a narrow place, it may be difficult to take measurements because of the physical arm blocking the way. Also, when attempting to measure the edges of a large object, the arm must be moved greatly each time. Since some arms can weigh upwards of 20 lbs, the person taking measurements can easily become fatigued when measuring for a long time.
KEYENCE WM Series is Recommended for Large Three-Dimensional Measurements

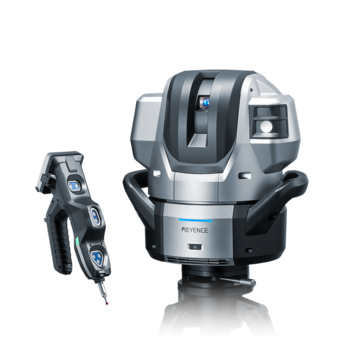
The WM Series is a three-dimensional measuring machine built to measure large parts and equipment. It works by placing a handheld wireless probe against an object to take points along the surface. For the wide area CMM, a range of up to 49 ft is possible using the probe and camera head unit.
This cmm utilizes the beneficial features of a conventional arm cmm while combating the typical disadvantages with unique technology. The WM Series is a portable CMM machine that can be used anywhere in the facility by anyone.
Key Features of WM Series Solution
Touch Screen
The touch screen on the WM Series cmm probe allows for easy use and optimal portability. As you move from feature to feature for measuring and inspecting, adjusting the cmm settings is easy along the way. There is no need to go back and forth between the part and a computer to record data.
3D CAD Comparison
The WM Series software includes simple 3D CAD comparison technology with a color map display showing comparisons between 3D CAD data and the actual measured points.
Camera Movement Function
The camera movement function is ideal for measuring large parts that are too big to fit the cmm’s field of view;
or complex parts that need a measurement from multiple angles. With this function on the WM Series wide-area cmm, you can move the WM Series to different areas to gather measurements or inspection points.
The function ensures alignment regardless of positioning to produce the full part’s measurement or inspection.
Statistical Analysis
The WM Series includes a statistical analysis function that automatically saves measurement data for statistical analysis. Not only that, but it also conducts the statistical analysis without any calculation from your end. This analysis includes:
- Pass/fail count
- Maximum/minimum value
- Average
- σ, 3σ, 6σ
- Cpk
- Increased variation trends
- Upward/downward measurement
- trends
- Periodic fluctuations
- Histograms
Triple Camera Tracking
The WM has seven probe markers that beam near-infrared light back to the infrared camera in the head unit. This emitted light allows the infrared camera in the head unit to track the probe's location and orientation. The head unit itself consists of three separate cameras that track the probe and the location of the head unit. These cameras include the probe search camera, the tracking camera, and the reference camera. Working together, these provide triple camera tracking to create precise measurements over the large measurement range.
Benefits of KEYENCE WM Series Wide Area CMM
Decreases Measuring Costs
Integrating the WM helps to lower costs by lessening the need for outside resources. Here are a few resources you can save on:
- Outsourcing metrologists: since the WM Series has high-grade precision regardless of the user’s expertise, technicians working on the project can quickly learn the new technology and perform metrology without formal training or prior experience.
- Easy maintenance: The WM Series is considered a hard gage since the measurement is all camera-based. Because of this, there is no need for re-calibration each year, just a simple re-certification that customers can complete on their own, in-house with a NIST traceable gage block.
Increases Efficiency
Adding the WM increases measuring efficiency because the measuring and inspection process can be continual. The WM has an accuracy of +/- 1 thou (28 um) without needing calibration or constant maintenance. Because of this, the measuring process doesn’t need to stop for any reason.
1. Continuous Measurement With Stable Accuracy
Because of the optical measurement, there is no fear of wear on the mechanical parts, and repeated use will not adversely affect the accuracy of the measurements. It is equipped with a self-diagnosis function, so it is possible to check whether the measurement is performed with the correct accuracy before measurement. It is also equipped with a function to self-compensate if the accuracy is affected by some cause, like temperature. Because of these specialized features, the WM Series CMM machine ensures accuracy at all times, regardless of operator.
2. Wide Measuring Range

*Maximum measuring range
A large measuring range of up to 15m (49') allows coverage for parts of all sizes, compared to the 3m to 4m range that conventional CMM machines have.
The WM Series wide-area CMM can automatically follow and measure anywhere in its range with the probe.
In addition, even when the probe’s line-of-sight is blocked, the camera can be moved so that it does not become a bottleneck of measurement.
3. Ease of Use for Perfect Wireless Probes Without Arms or Cables

The WM Series has a lightweight probe that only needs one operator for measurement. You can take measurements by simply holding it in a place where you want to measure it. In addition, since the main measurement elements can be selected from the touch panel on the probe, there is no need to move back and forth between the control PC and the object to be measured.
FAQs About Arm CMM
How do CMM arms work?
Arm CMMs use angular measurements, via rotary encoders, taken at the joints of the arm to calculate the position of the stylus tip. KEYENCE CMMs use a combination of cameras and sensors instead since encoders can slowly degrade over time. This allows the user to use a wireless, ergonomically probe instead of a non-ergonomic arm. Additionally, since the XM Series CMM works based off of line-of-sight without rotary encoders, the system does not have internal moving parts, which eliminates costly annual recalibration fees. Another major benefit is that our CMMs are "infinite axis". You'll notice that arm CMMs have an axis rating. Our probes can come in at any orientation as long as the head unit can read the lights on the probe.
What is advantageous about a portable CMM?
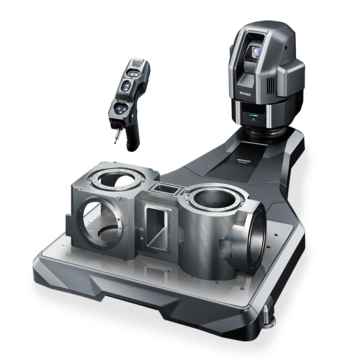
A portable CMM allows for versatility. KEYENCE's CMMs work just as well on the shop floor as inside of a quality lab. Similar to arm CMMs, they can be moved around to different locations. However, the head unit does not have to be clamped down like many arm CMMs. It can be placed on the stage it comes with, on an optional tripod, or mounted to a table. The head itself simply locks into a mount, so users can easily take the head unit and probe to different stations or leave it in the same location at all times.
How to choose the right CMM?
The XM Series comes standard with a stage. However, it has the versatility to be placed in other areas. Let's say that you want to have stations around your shop floor for your CMM. You can purchase mounts and have them located around your facility to transport the measurement unit to. Maybe you want the ability to measure a part while its in-machine or have a 3' x 4' that is incredibly heavy and currently located close to the ground. In these instances, you can place the head unit on a tripod and measure the part on the floor and even directly inside of a machine. A product specialist can assist with deciding what's best for you. What about XM vs WM CMM? These are essentially a little brother and big brother version of each other. For parts that are less than 6' wide or just under 4' cubed, the XM is the best fit. If the majority of your parts are 6+ feet, then you want the bigger version, the WM series. If you have a mix of parts in both ranges, our CMM product specialists exclusively work with those 2 systems and can help assist choosing what's best for you.
What are the different applications for the CMM?
CMMs have many capabilities. The most common use is to take 3D measurements, including GD&T that could be difficult, less repeatable, or impossible to measure with hand tools. What sets apart KEYENCE CMMs from competitors is the ability to take a picture of the physical part you are measuring and overly measurements using augmented reality to make inspection easy for anyone to understand. This combined with the user interface gives our CMMs a lower learning curve for on-boarding and a faster road to mastery. CMMs can assist with measuring the "profile" of a part, for example. CMMs are very commonly used on machined parts and are used in various industries, ranging from medical to aerospace. Our CMMs are manual and most often used in manufacturing industries, but we have plenty of users in niche areas that have great success with our CMMs.
What is in-machine measurement(on-machine measurement)?
In-machine measurement is the ability to measure a part while it is inside of the machine manufacturing it, or a similar location. The benefit to in-machine measurement is saved time. If you have a heavy part that would normally need to be moved via multiple individuals or even a powered machine, such as a crane, you can avoid that with in-machine inspection. Additionally, there is the ability to inspect mid-machining process. If you want to inspect a part mid-machining, you can simply inspect it while the part is being made to reduce time and reduce error since there is no need to remove the part from the fixture.
Related Downloads
Brochure for the WM Series Wide-Area CMM. A portable setup with a wireless handheld probe that enables users measure large parts and equipment.
Brochure for the XM-5000 Series Handheld CMM. Portable CMM to easily and accurately measure 3D and GD&T features anywhere including the shop floor and in the machine tool.
See common coordinate measuring machine application examples measured on the XM Series Handheld CMM. Application examples include: turned parts, machined parts, stampings, castings, and molded parts.
Overcome inspections obstacles including common challenges with conventional handheld measurement tools and see why manufacturers choose the XM Series Handheld CMM as their first coordinate measuring machine.

